This week I was asked by a number of followers on social media, how I made this little GIF that I posted last week. This isn’t something that I plan on doing a lot of as there are tutorials aplenty all over the internet but in the spirit of new realms for the blog, I thought I would do a simple ‘How to…’ to answer the question.
All you’ll need are some images that you want to turn into a GIF and Photoshop. Sorry, if you don’t have Photoshop this might be a completely worthless blog post for you, but if you do it’s really simple! So simple in fact even I can do it, so here we go…
First of all, I would recommend using images that are all either portrait or in this case landscape. Make sure that all of the images are exactly the same dimensions and then follow these simple steps to create your GIF.
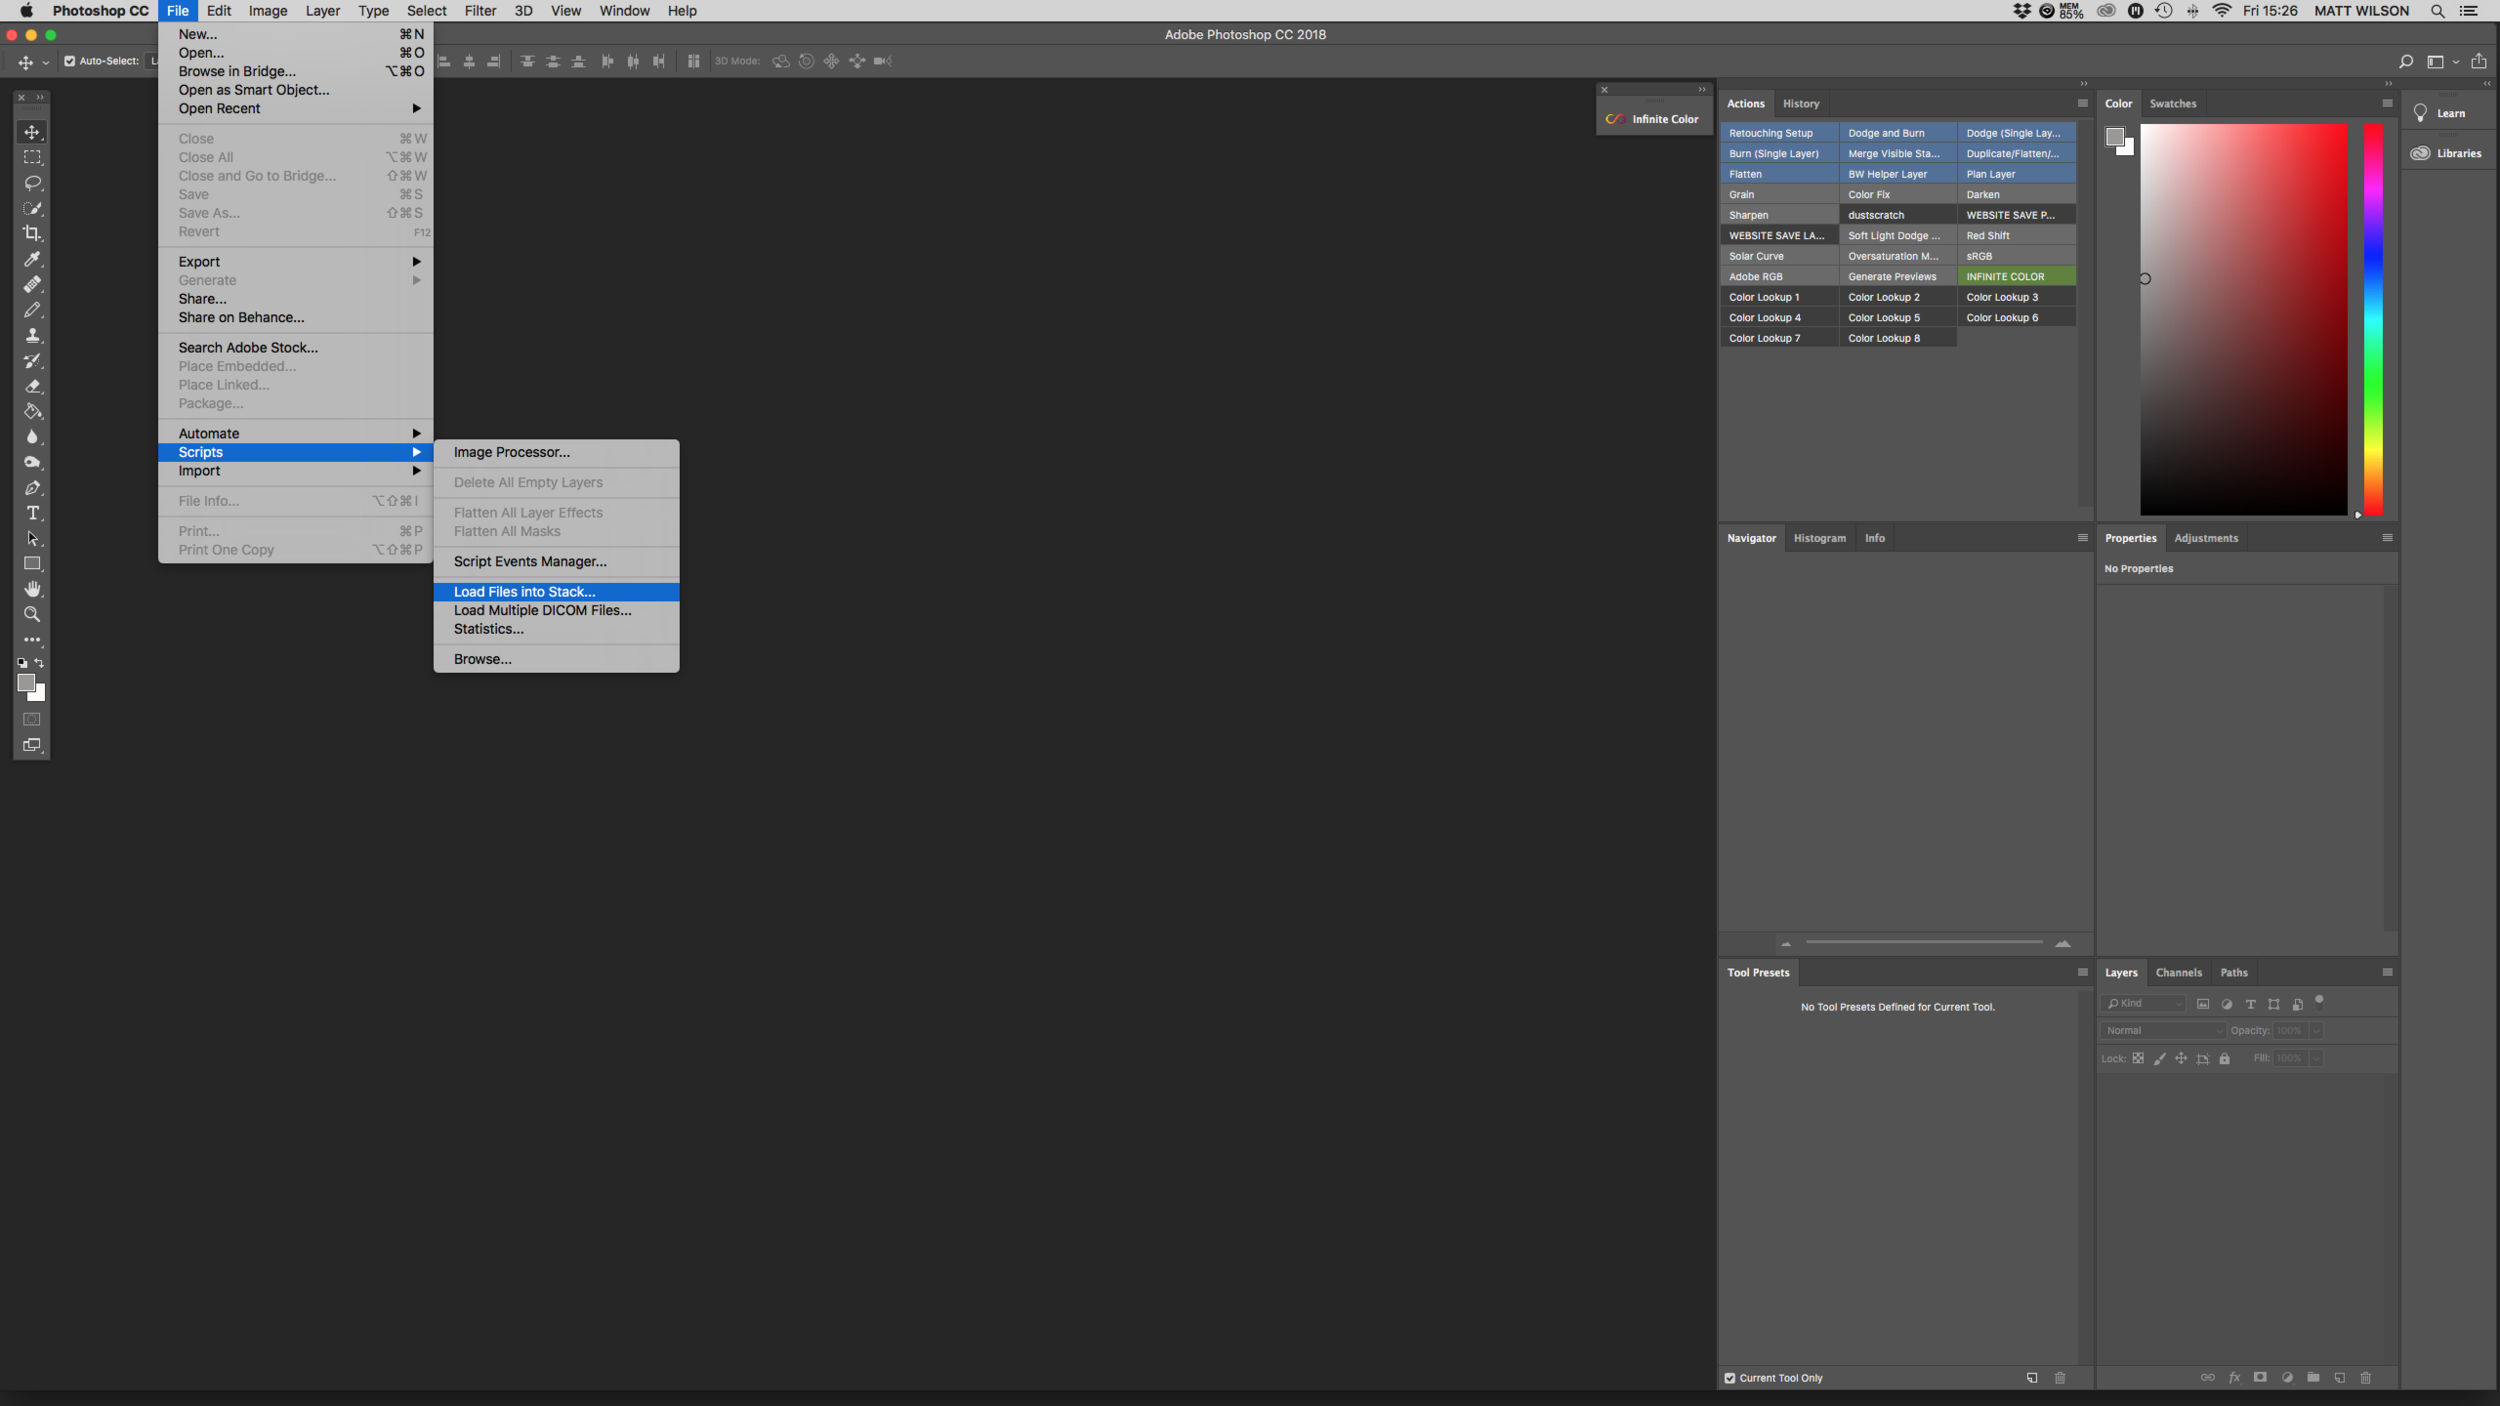
1. Open Photoshop and select ‘File - Scripts - Load Files into Stack’
2. This will bring up the option to browse your files and select all of the files you would like to turn into a GIF.
3. Click open and you will be taken back to the Load Layers box, where your selected files should be. Click OK.
NOTE: Before pressing OK, make sure that you tick the box saying ‘Attempt to Automatically align Source Images’. This will align all of your images and it will save you doing it manually.
4. After clicking OK, all of your images should be located on top of one another in layers.
Now we can turn these Layers into a GIF.
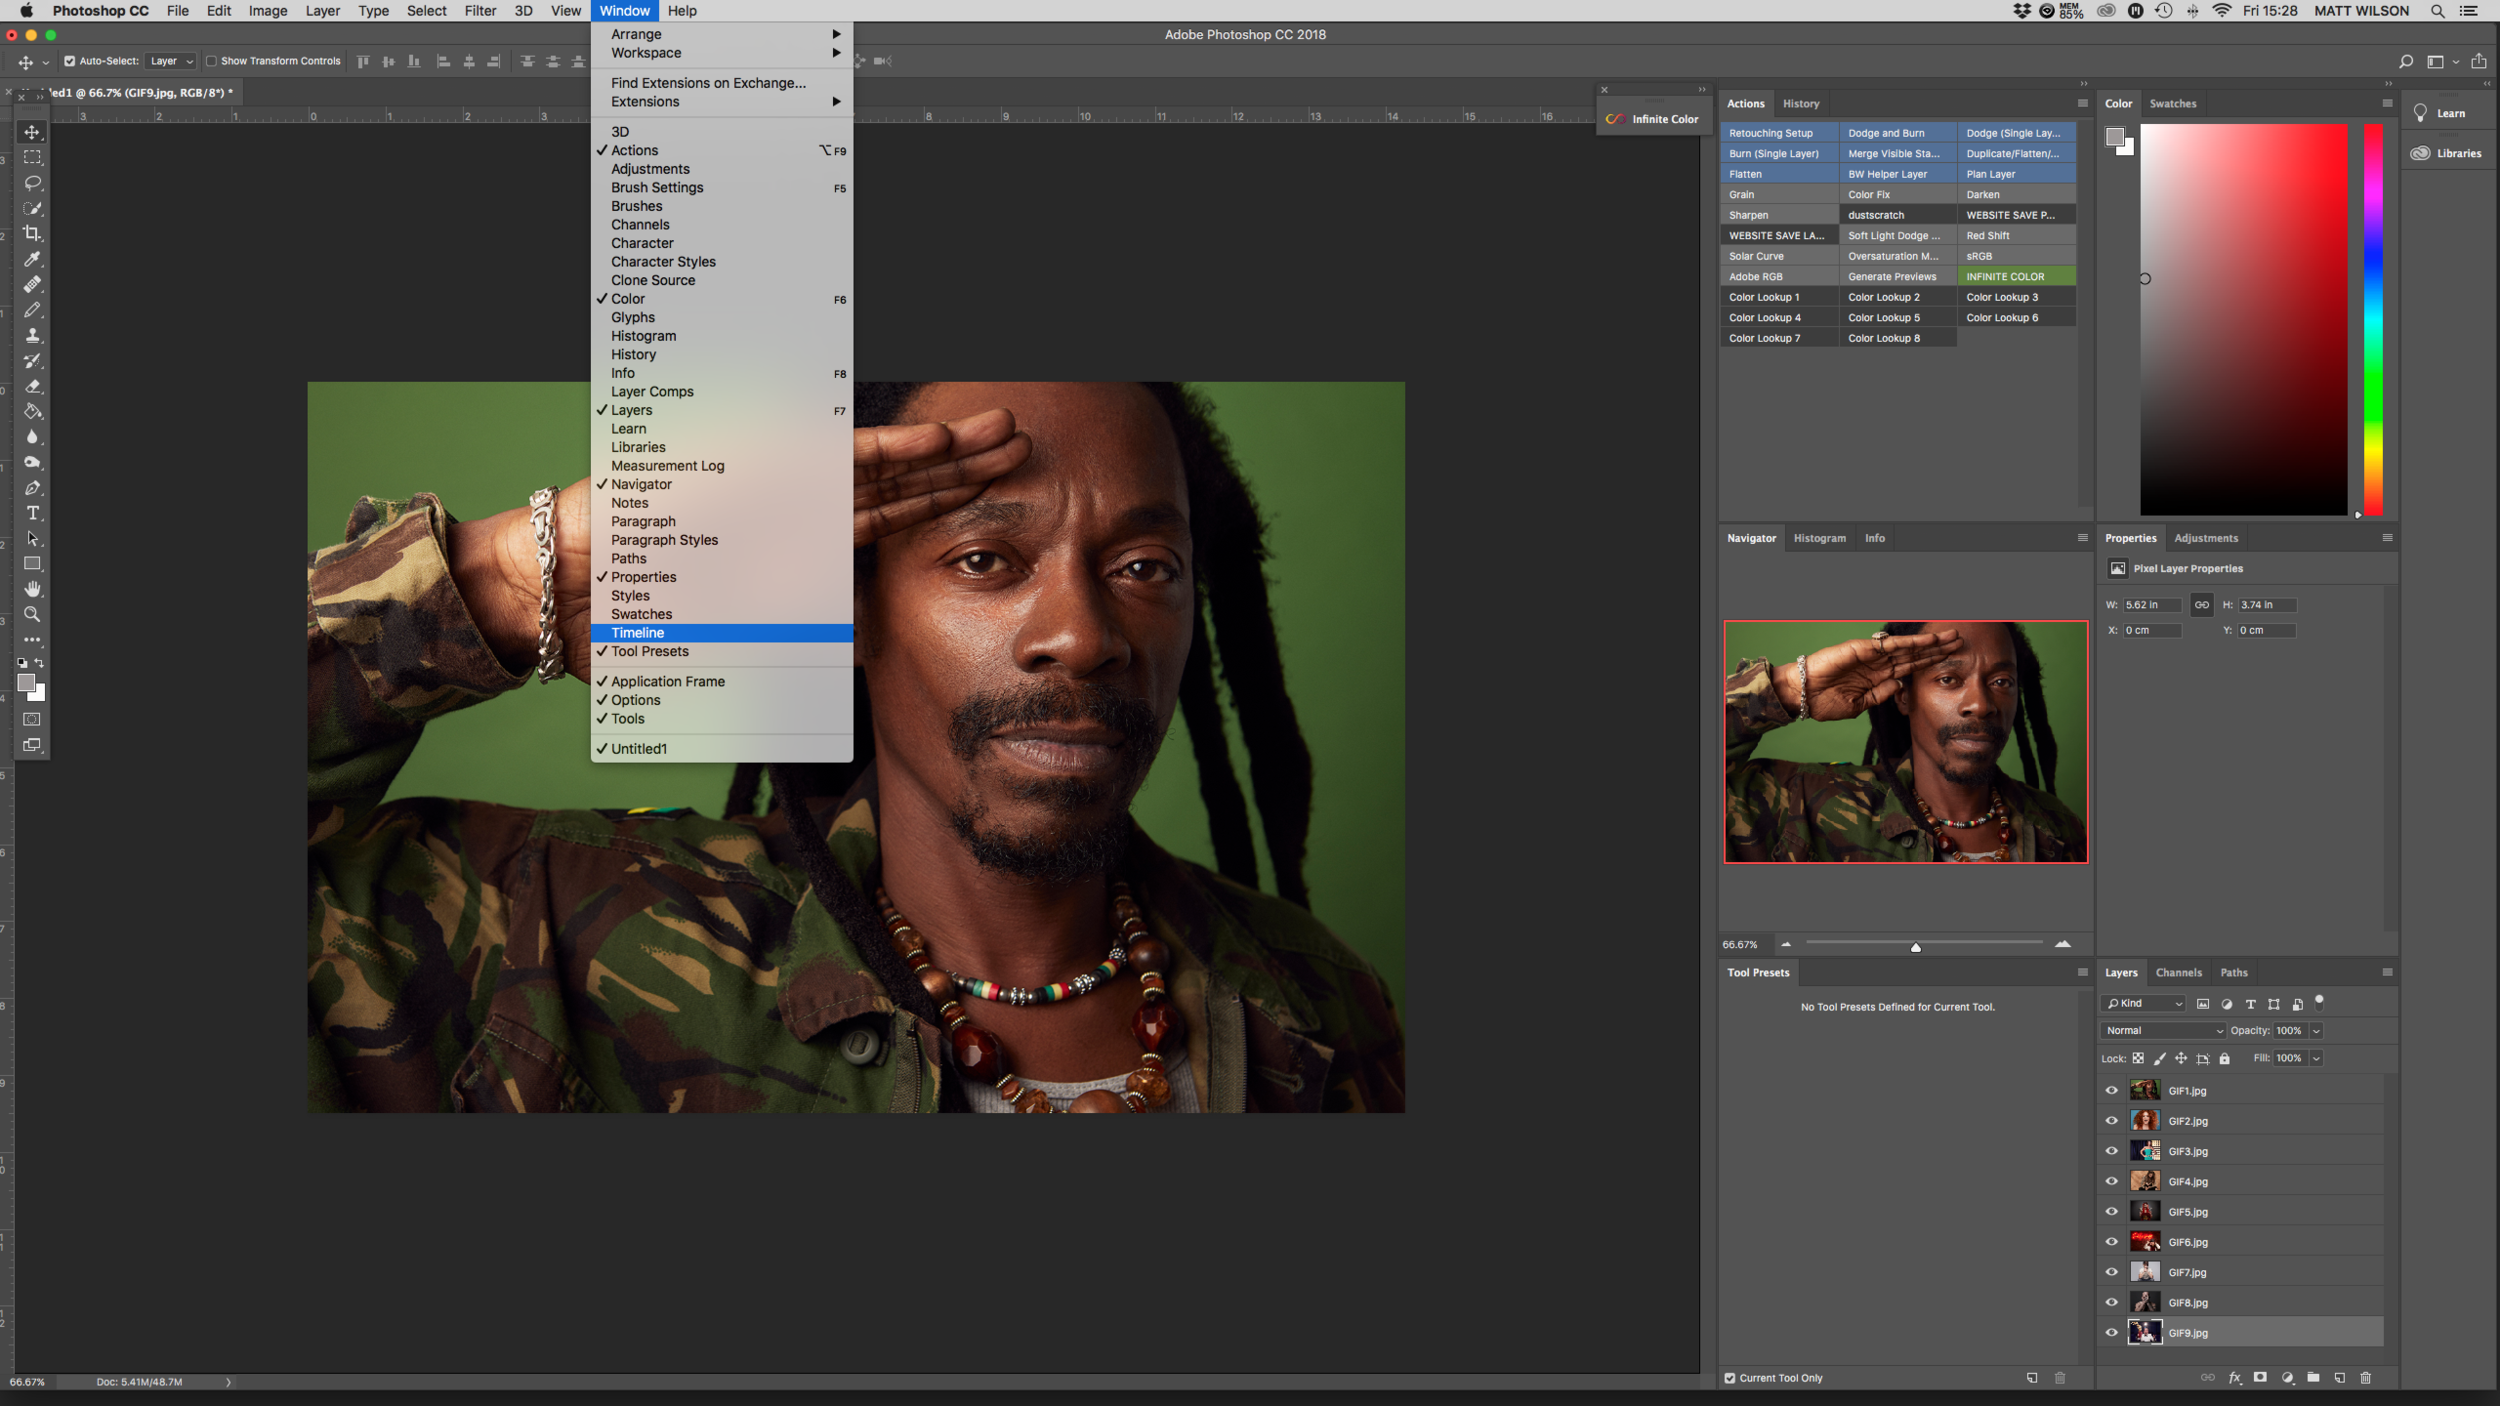
5. Select Window - Timeline
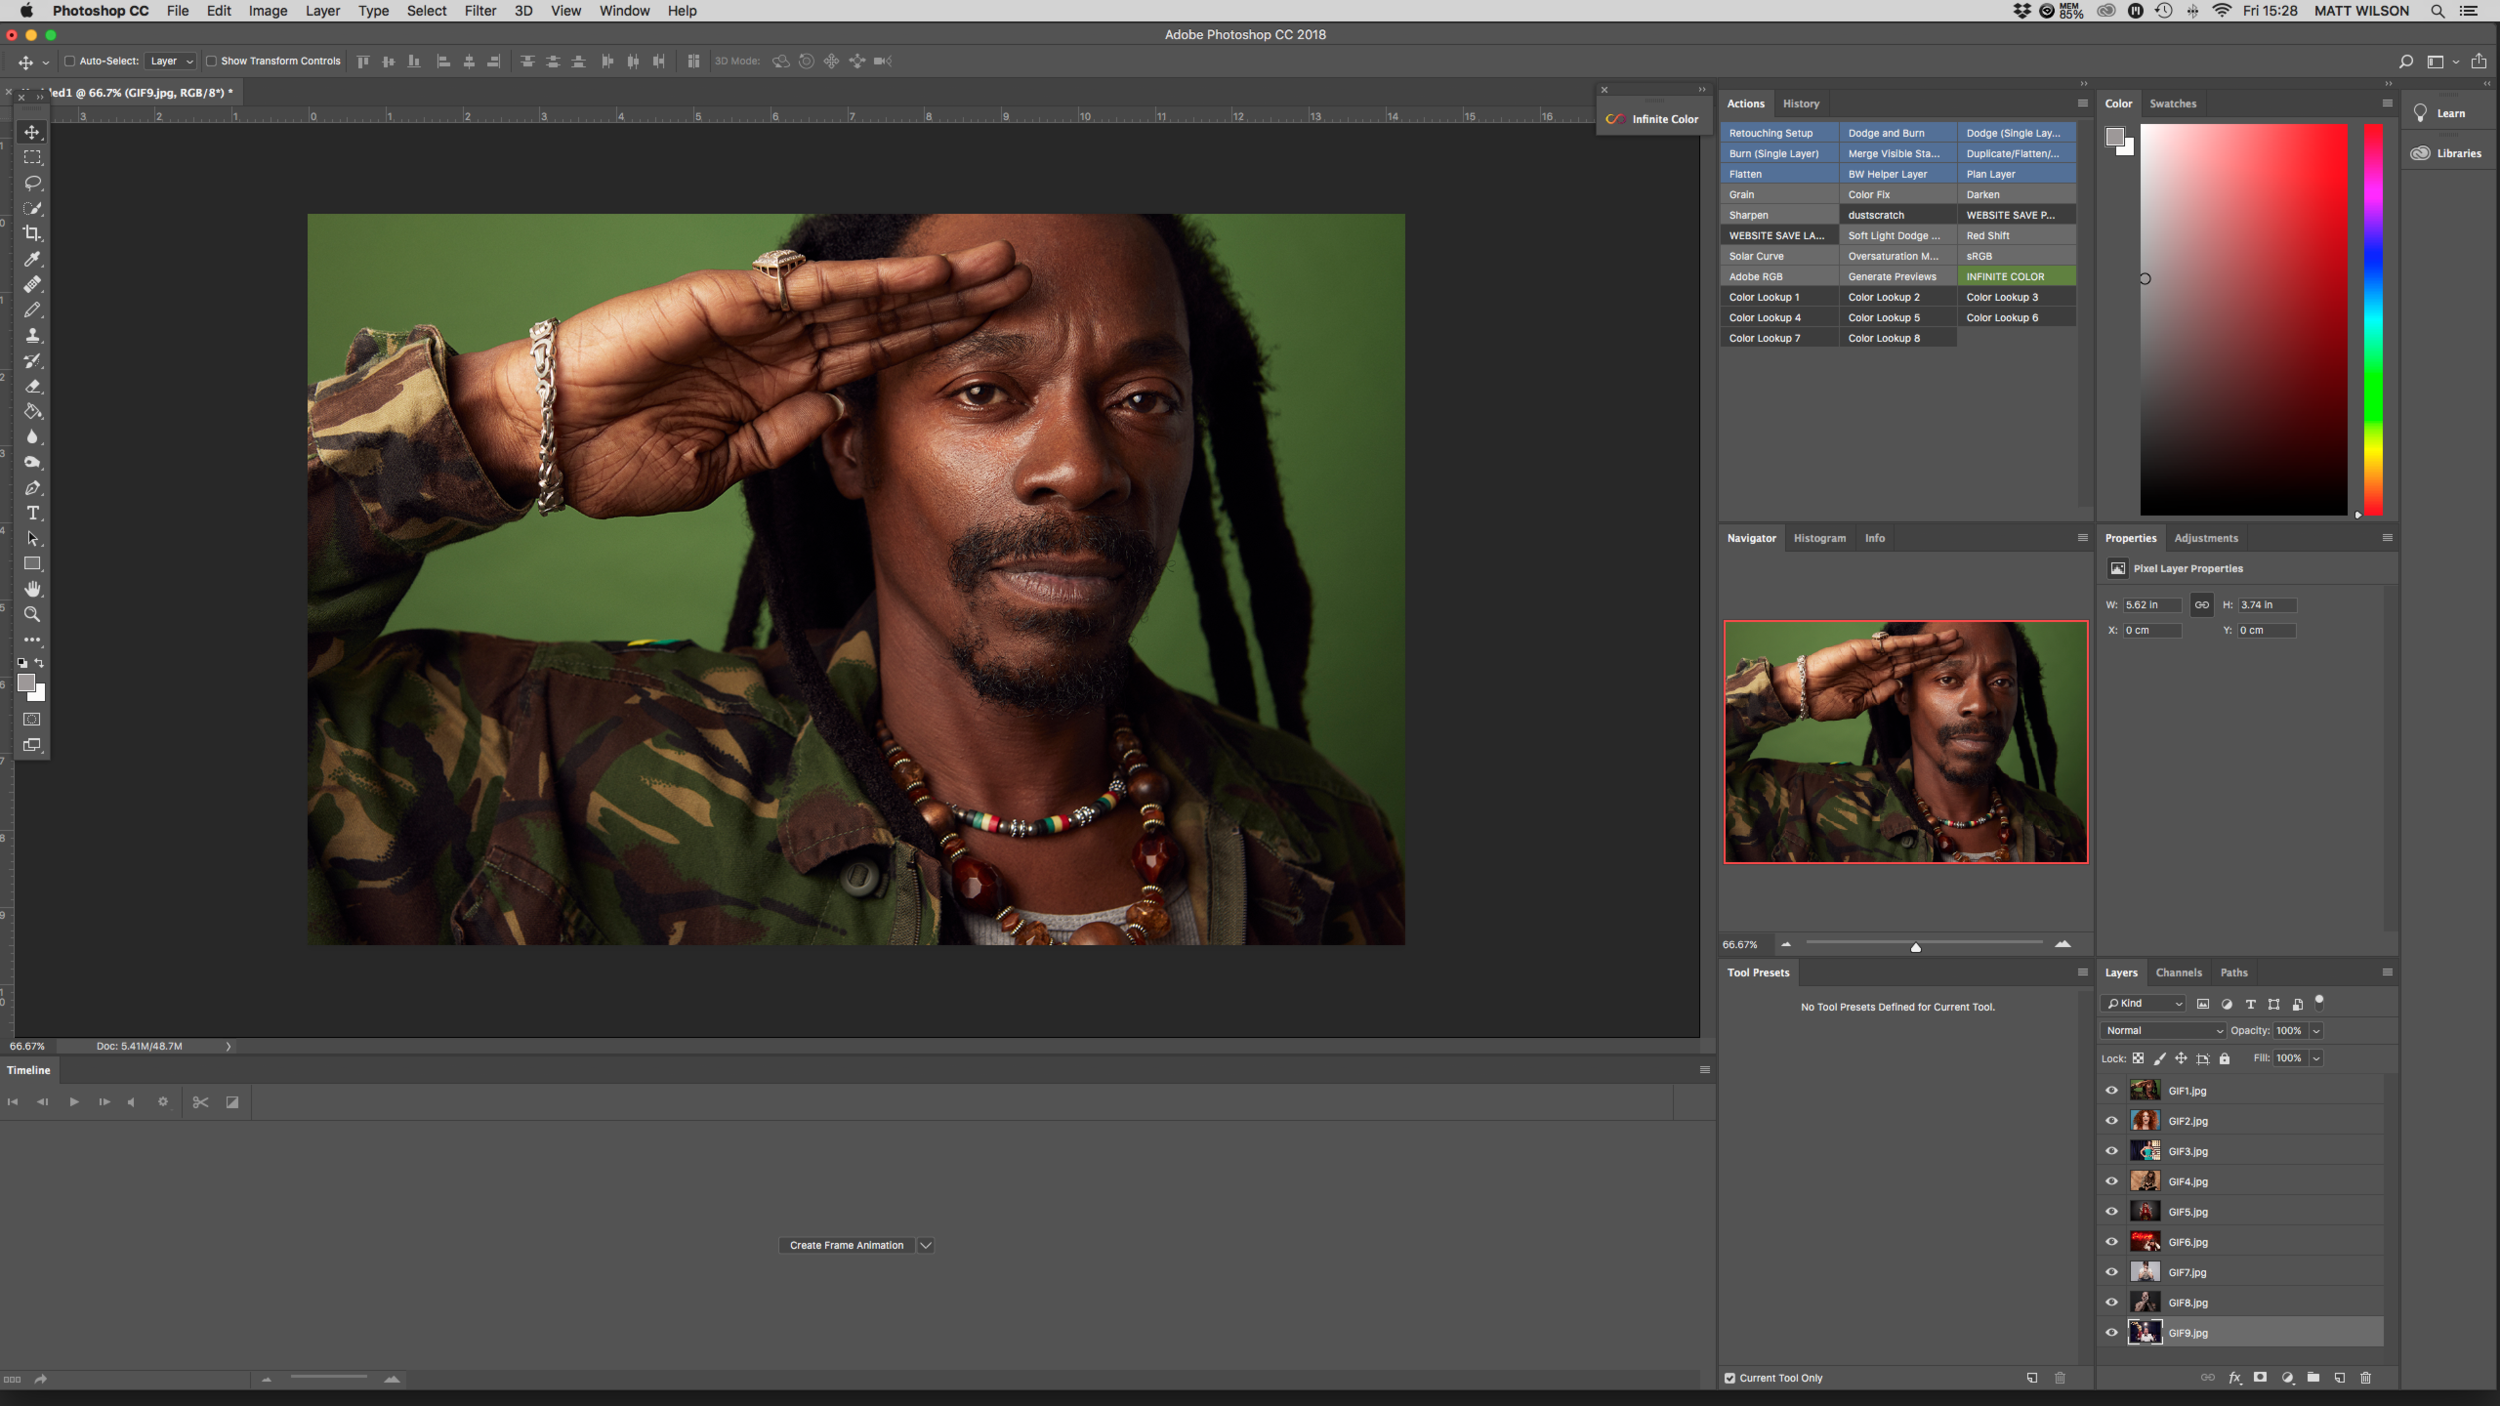
This will bring up the timeline at the bottom of your screen (see below).
6. Click on ‘Create Frame Animation’. This will create a frame of your first layer in the stack. Obviously, to make the GIF you need all of your layers to show up in the frame animation section.
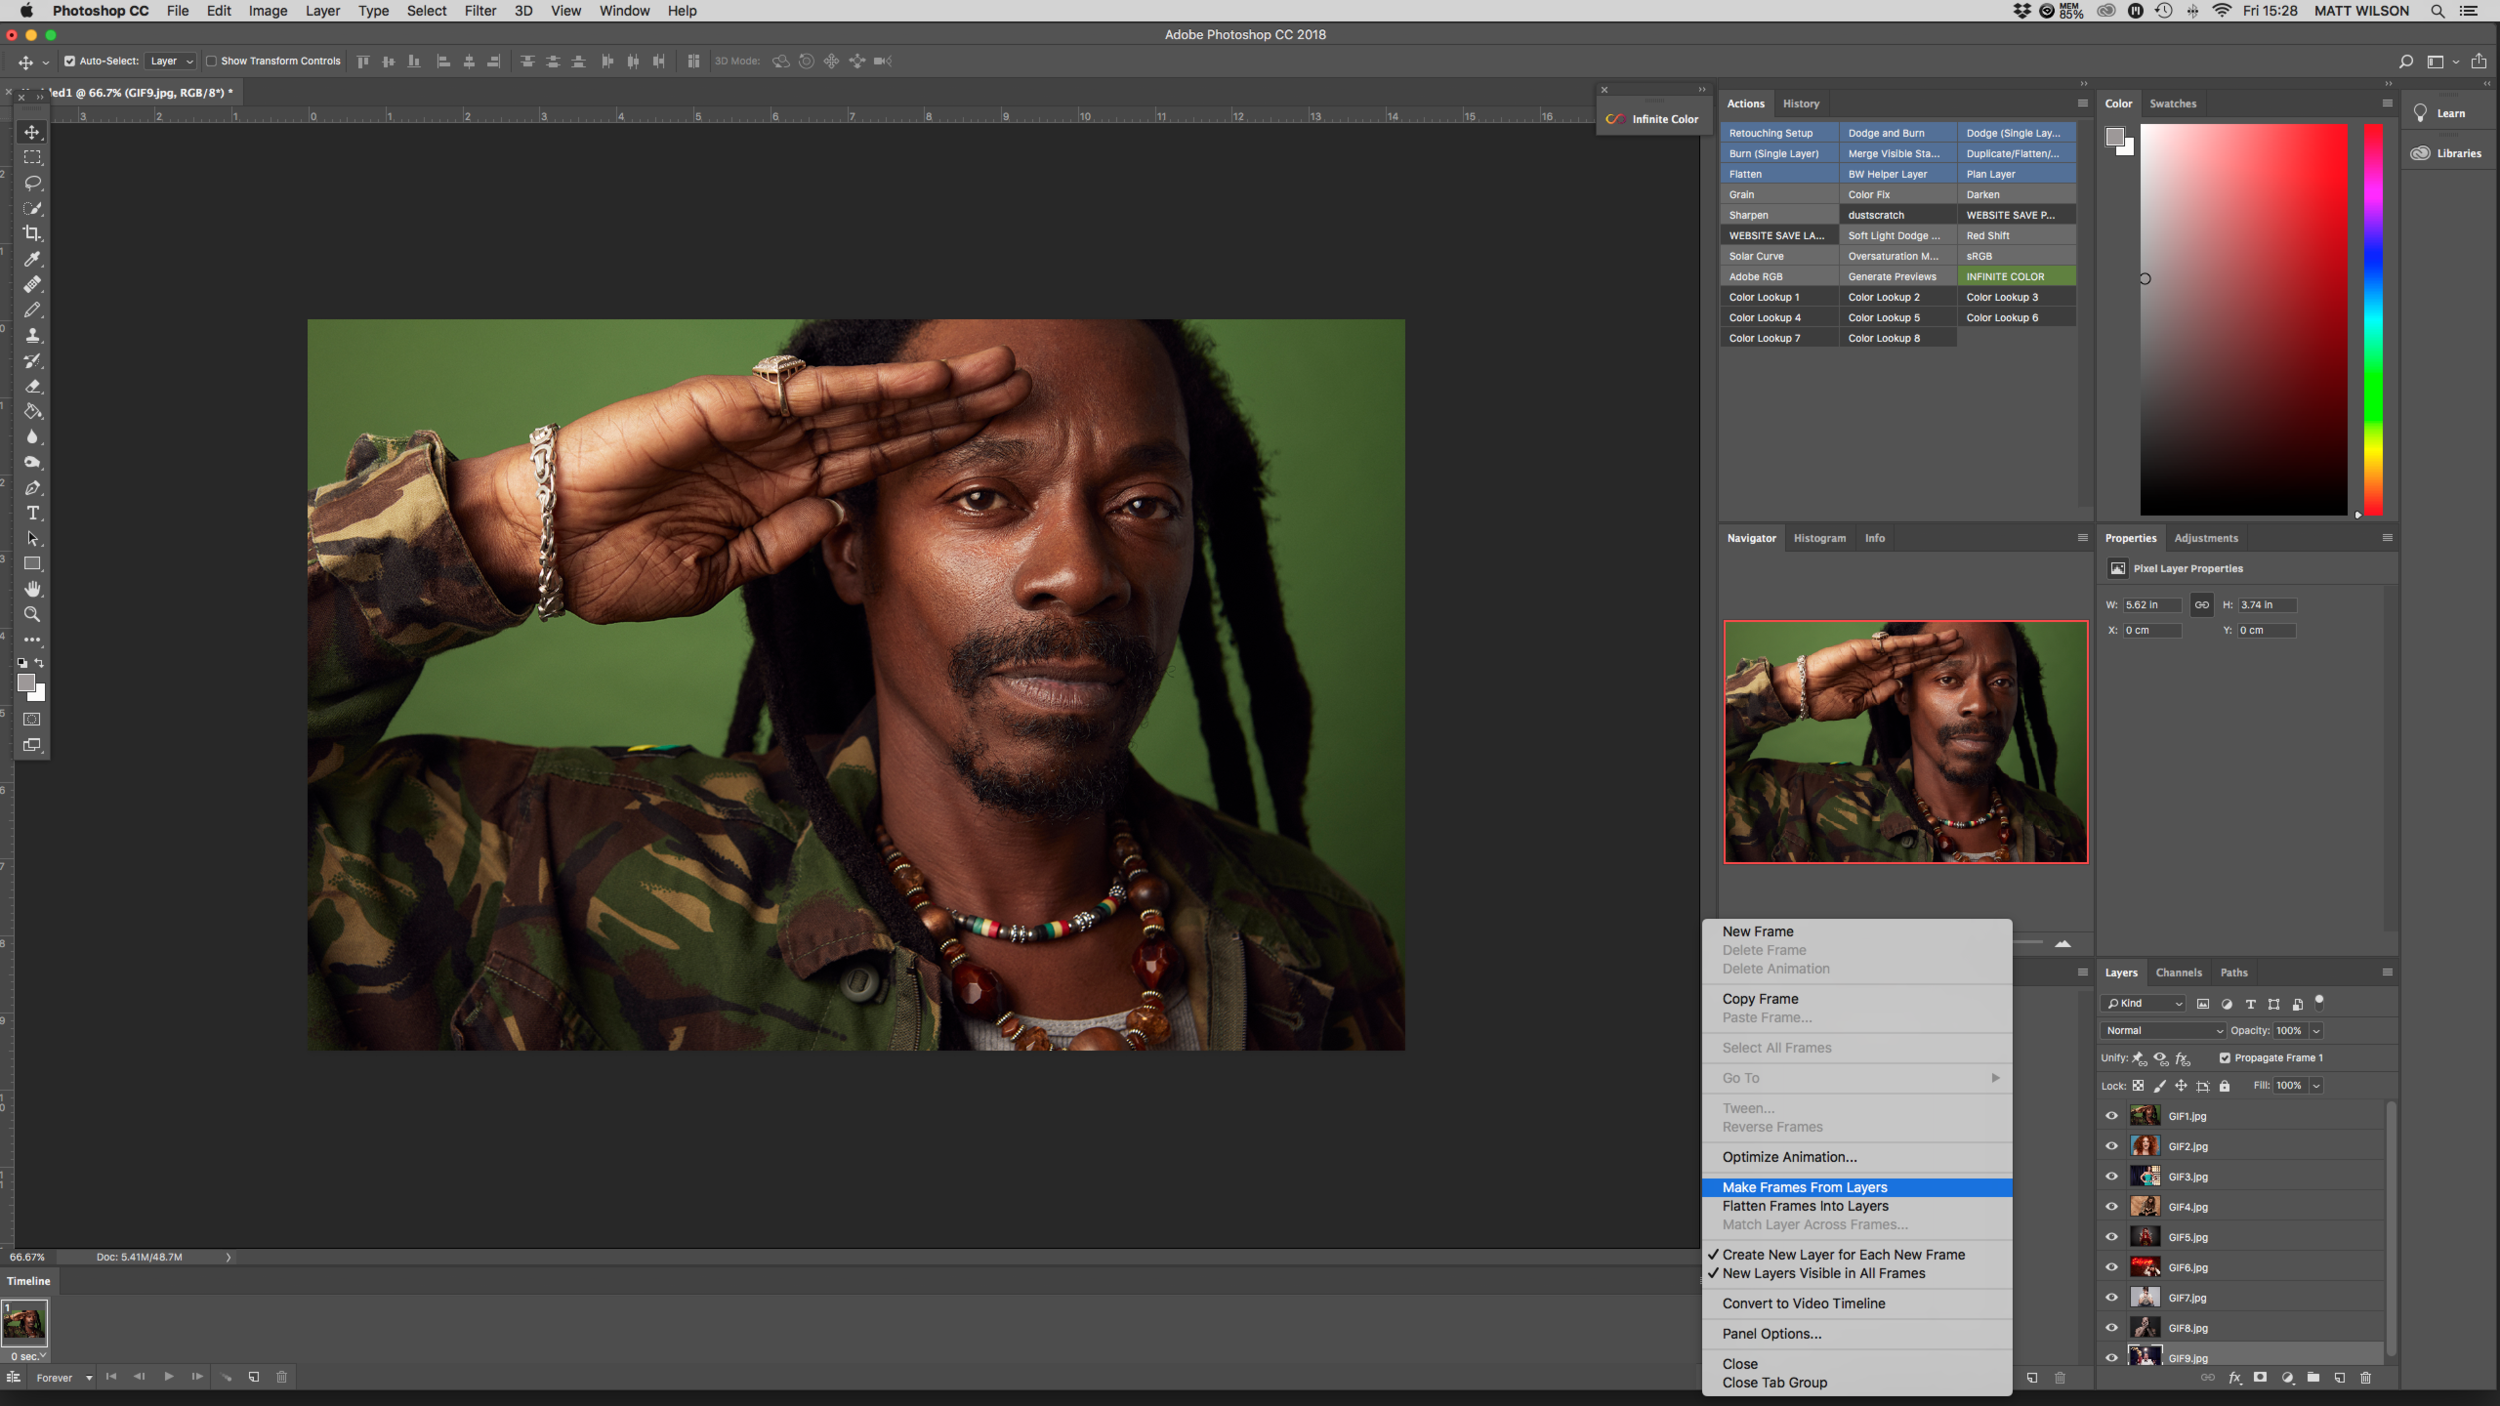
7. Click on the horizontal lines at the right-hand corner of the Timeline and select ‘Make Frames from Layers’
8. You should now see all of your Layers as Frames within the Timeline.
9. At this point, you can control how long you want between each image. I usually use 0.2 - 0.5 second intervals. To do this click on your first frame and hold down shift on your keyboard and then click on the last frame in your animation. Make sure all of your Frames are highlighted and click on the drop-down arrow at the bottom right corner of any frame. You can select the appropriate interval times here.
10. To make the GIF loop continuously make sure that you click ‘Forever’ in the drop-down menu below your Frames.
Once you’ve done this you can now click ‘Play’ and see how your GIF is looking. Experiment with the intervals and see what works best for you.
Now all you have to do is save this as a GIF file.
11. Select File - Export - Save for Web Legacy.
12. A new ‘Save for Web’ box will appear. In the right-hand corner is another drop-down box with a number of different saving options. Select GIF and then click Save.
It’s that simple! I hope that this was easy for you to follow and you now have a GIF of your own to use on your website or social media channels. I will say that Instagram makes it a little more complicated and you will have to turn the GIF into an MP4 to post it on their platform. There are a number of quick sites that do this for free though. Check out the link below if you’re having trouble finding one.
As I said earlier, I don’t think I will be doing many tutorial-style blog posts as I’m sure a quick google will find you anything that you want to know but for those of you who asked about the GIF, I hope this has answered your question.
Stay tuned for next weeks exciting instalment on the Creative Nowhere Land Blog! Sh*t! I better try and think of something exciting to post next week now but until then… Keep creating!


